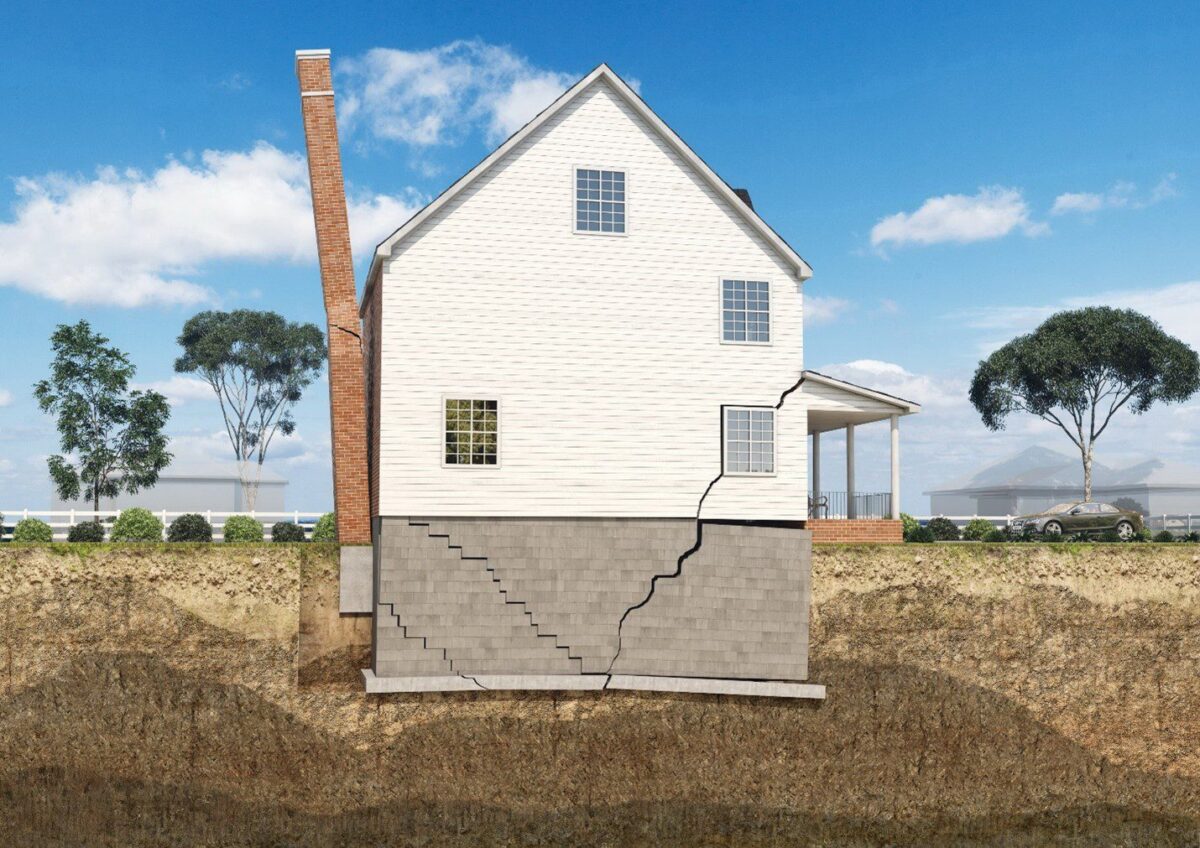
There are many areas of a home that aren’t scary when a homeowner is facing repairs or improvements – but foundation repairs tend to feel overwhelming, daunting, and costly for homeowners. But, it does not have to be this way. Below we break down the process to repair a sinking foundation into three easy steps.
The signs of a sinking foundation are not difficult to spot. Cracks in foundation walls or in drywall sheets are telltale signs of trouble. Stairstep-shaped cracks in brick or block mortar are always indications that your basement or foundation is shifting.
Step 1: Digging holes
There are two types of digging that may need to take place depending on the type of repair being done. To gain access to the ground around your foundation, a contractor will need to begin by digging holes. Depending on what is needed to complete the repair to your foundation, this may involve just digging holes around the perimeter of your foundation or, if you require interior piers, holes will be dug directly underneath your house. Some foundation repairs need to be made by removing any flooring or carpet on top of the foundation and breaking out sections of the concrete slab foundation. This is done in order to install the piers before fixing the foundation.
Step 2: Lifting the foundation
At BDB Waterproofing we utilize a push pier system to mechanically transfer the weight of your home to stabilize it and end any settling that has occurred. We use We use SafeBasements™ Push Piers that are hydraulically pushed into the ground to predetermined depths where those deep, suitable soils are found. This requires that the foundation be elevated using hydraulic jacks for your house to be positioned on top of the foundation piers in order to stabilize it. High-pressure equipment hydraulically drives rugged steel piers down to solid bedrock or proper load-bearing strata. The weight of your home is carefully transferred from the original unstable soil to rock-solid piers so your home is secure with the pier system permanently in place and hidden from view.
Step 3: Covering holes
The final step is to cover all the holes that were dug and clean up the area that was disturbed in the process. Our experienced crew will ensure that all holes that were dug under or around your foundation are filled in with the soil that was originally removed. Because soil compresses when it rains or floods, the soil around your foundation should be piled higher than usual after foundation repair. This gives the soil an opportunity to slowly sink into holes over time. It may take a year or more to become fully compressed. Do not be alarmed by excess soil.
And there it is – as easy as one, two, three! You do not need to be scared of foundation repairs.
Do you have questions about your foundation?
When it comes to maintaining the integrity of your home’s foundation, there’s no one you can trust quite like BDB Waterproofing. Contact BDB Waterproofing at 402-779-3165 or use the contact form on our website.

